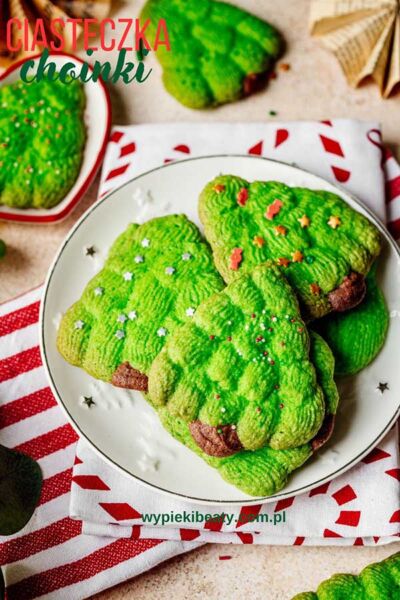
Shortbread butter Christmas tree cookies recipe with video
Buttery Green Christmas Tree Cookies – Step-by-Step Recipe with Video & Photos
Perfect for the holidays and fun to make with the whole family.
Składniki
Ingredients for butter Christmas tree cookies
- 250 g butter (soft)
- 100 g powdered sugar ( ⅔ cup)
- 225 g all-purpose flour ( 1½ cups)
- 25 g potato starch/flour (1 slightly heaped tablespoon)
- approx. 0.5 teaspoon cocoa powder
- green food coloring
- flavoring ( optional)
- sugar sprinkles (optional)
Instrukcja
How to make butter Christmas tree cookies step by step
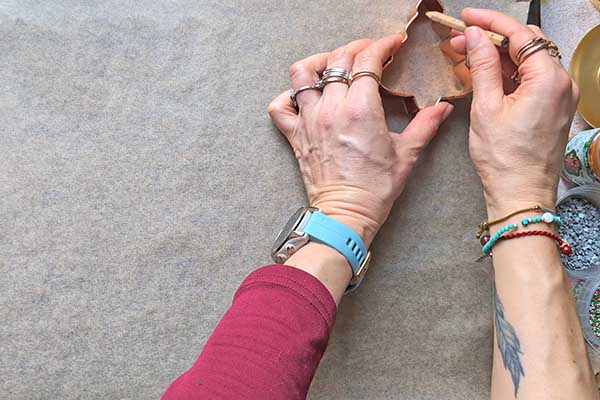
Step 1 – Preparation
- Line two large baking sheets with parchment paper and draw Christmas tree shapes on them, keeping space between them (the cookies will spread slightly during baking) - I used a cookie cutter for this.
- Sift both flours together through a fine-mesh sieve.225 g all-purpose flour, 25 g potato starch/flour

Step 2 – Shaping the Cookie Dough
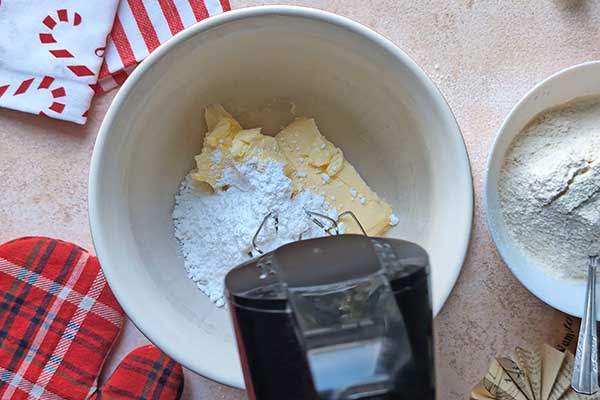
- Add the butter and powdered sugar (and vanilla extract, if using) to a mixing bowl.250 g butter, 100 g powdered sugar, flavoring
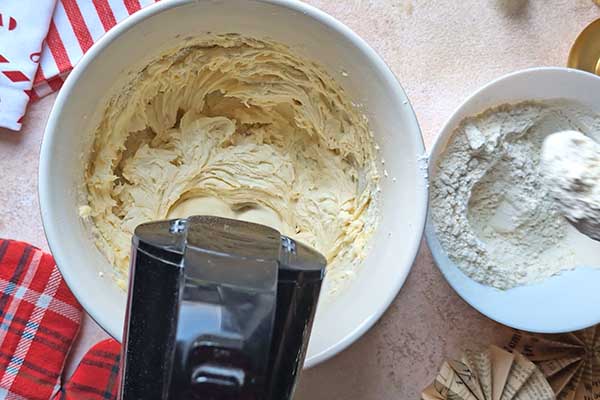
- Beat together on high speed for about 3 minutes, until the mixture turns pale and noticeably increases in volume.

- Reduce the mixer speed to low and add the sifted flours in batches, mixing briefly after each addition.
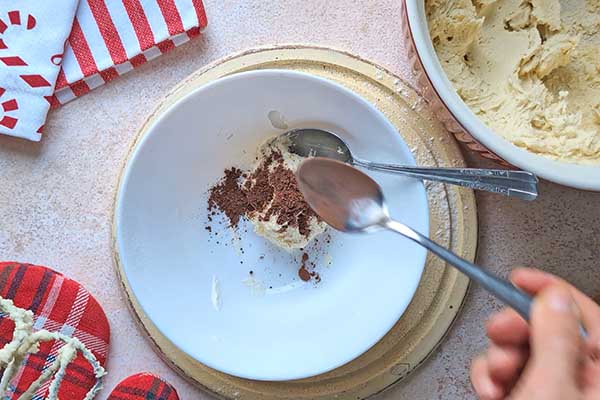
- Set aside about 1–1½ tablespoons of the dough in a bowl and stir in the cocoa powder using a spoon.approx. 0.5 teaspoon cocoa powder
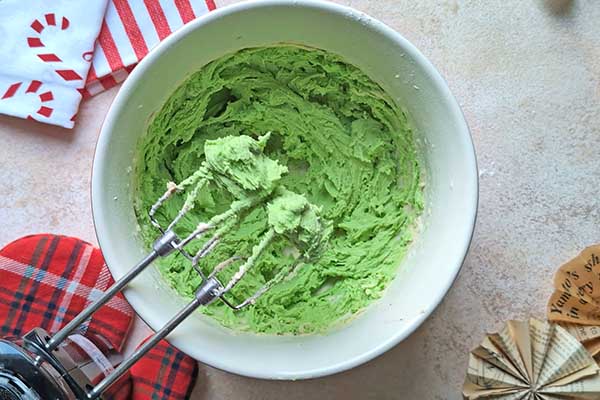
- Add a few drops of green food coloring to the larger portion of the dough.green food coloring

- Mix the dough thoroughly, and add a bit more coloring if needed – keep in mind the color will deepen slightly during baking.
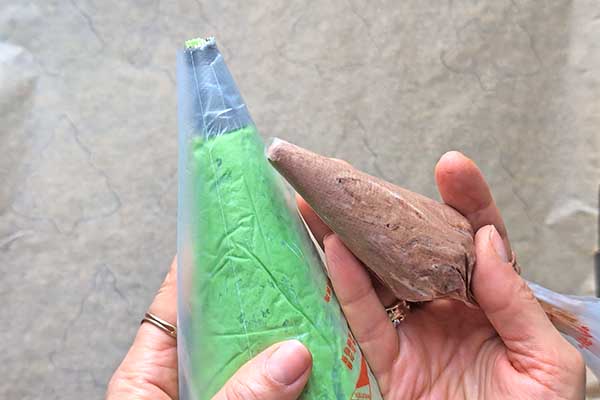
- Transfer both doughs into separate piping bags – I fitted my green dough bag with a Wilton 6B tip.
Step 3 – Piping the Christmas Tree Cookies
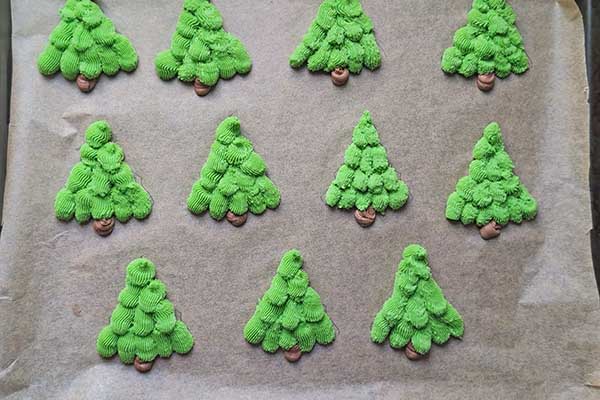
- Snip a small corner off the bag with the brown dough and pipe a little at the base of the tree to form the trunk.
- Starting from the bottom, pipe small portions of the green dough – I used 4–5 blobs. For the next row, slightly overlapping the bottom edge, pipe about 3 blobs, then 2, and finally 1 at the top.
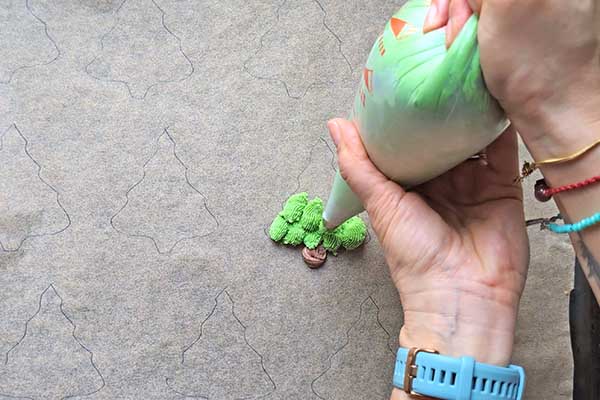
- Make sure to leave some space between the cookies, as they will spread slightly while baking!
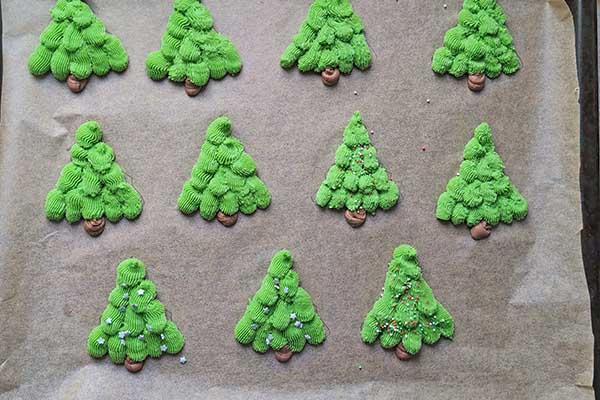
- If you like, you can now sprinkle the tops of the trees with colorful sugar sprinkles.sugar sprinkles
- Chill the cookie sheets in the fridge for about an hour.
Step 4 – Baking the Christmas Tree Cookies
- While the cookies chill, preheat the oven to 340°F (convection).
- Place the cookie sheets in the preheated oven and bake for about 15 minutes (it’s a good idea to swap the sheets halfway through, after 10 minutes).
- Remove the cookie sheets from the oven and let the cookies cool – they’re very soft right out of the oven, so don’t try to lift them off immediately!
Uwagi
One cup holds 250 ml.
Check the notes below the recipe for any additional tips or suggestions.
The recipe video is in Polish, but you can watch it to see the step-by-step process.
Wartości Odżywcze
Servings: 1pieceCalories: 172kcalCarbohydrates: 16gProtein: 1gFat: 12g
Tried this recipe?Daj znać w komentarzu!
